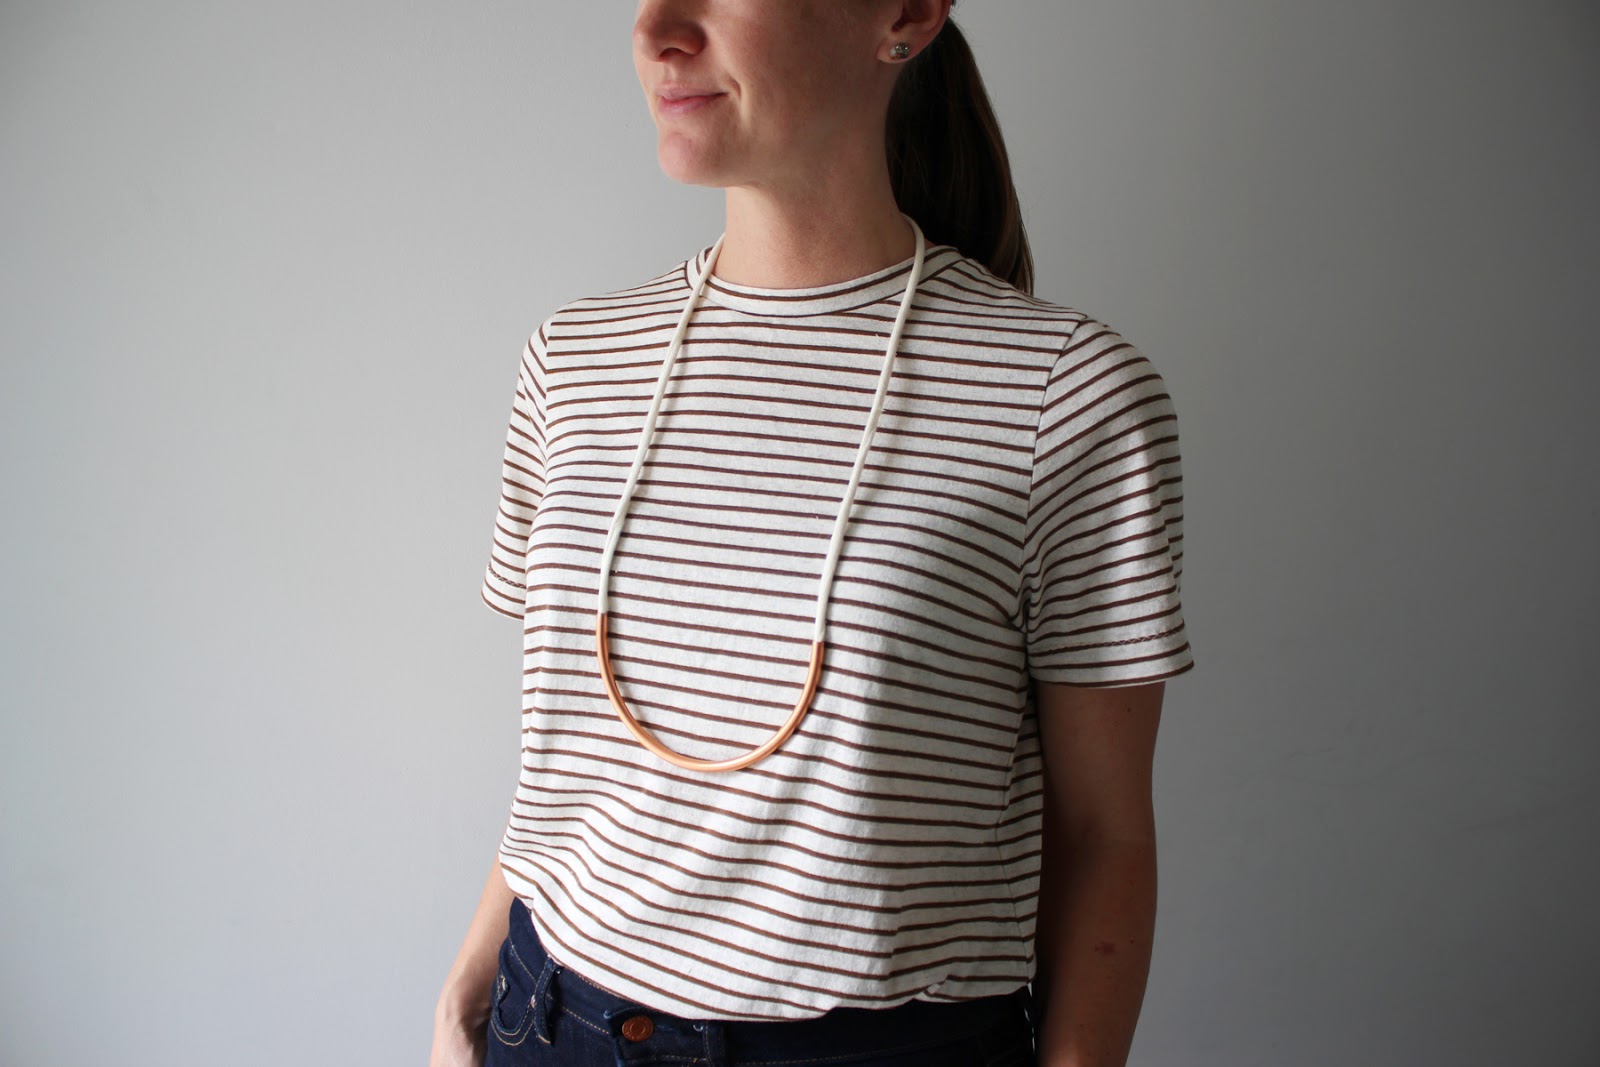
My sewing super powers may have gone to my head, now I think I can make anything. Pants, sweaters, jewelry...I wanted a curved tube necklace, so I made a curved tube necklace.
The
copper pipe for this necklace came from the plumbing section at Lowe's. Most hardware stores have precut short sections of small diameter copper piping for about $6. I tried this necklace with two different diameters of pipe. The one above is 1/4in inside diameter, the one below is 1/4in outside diameter. The smaller pipe is much easier to work with, and is probably the best place to start.
I was feeling pretty pleased with my $6 necklace until I saw what a pipe-cutter cost. The only one at our Lowe's was $40, pretty steep for a single DIY. Luckily, my husband has as many well stocked hobbies as I do, and he already has a very sturdy pipe cutter. If you don't see much plumbing work in your future, I think this
$6 pipe cutter from Home Depot would be just fine. This copper piping is soft enough to bend with your hands, it would work with a cheap-o tool.
I used a Pyrex bowl to set the diameter of my necklaces. I experimented with parking bollards and street sign posts. They both worked just fine, but the bowl was way more convenient.
For the string, I cut a strip of cotton knit from my last
cardigan. Any knit that rolls when you stretch it will work. I suggest a 1" wide strip, but you'll have to play with that to see what fits through the pipe. I prefer the rolled knit, to an actual cord because you can easily adjust the thickness to fit any size pipe. For both necklaces I made short "beads" from the pipe to add a little interest at the back.
DIY CURVED TUBE NECKLACE TUTORIAL
You will need: A 1/4in OD (outside diameter) copper pipe, 12-24in long. Strip of jersey knit fabric (that will roll when stretched) approx. 1in x 48in. Something sturdy, and round with about 5in diameter. I used a Pyrex bowl.
Use the round thing as a form, and bend the copper pipe around the outside curve. Bend slowly and carefully, being careful not to kink the pipe.
Make a mark along the pipe where you would like the necklace to begin and end. I used my cutting mat to make sure the curve was symmetrical. The pipe cutter makes a slight rounded edge at the cut, so it is best to cut both ends of the pipe to ensure the finish will be similar. Align the blade of the pipe cutter with the mark. Tighten the cutter until the blade is just gripping the pipe, and twist the pipe back and foutth so the blade rolls over the entire circumference of the pipe.
Tighten the cutter a tiny bit at a time, turning the pipe along the blade, until the pipe is cut the whole way through. It is important to tighten the clamp on the cutter slowly so you don't crimp the pipe.
For my necklaces I cut the main curve, and two 3/4in long beads for each end of the string. Feed the string through each bead, and the curved piece. Depending on the thickness of your string, you may be able to do this by hand. I attached my string to the end of a pipe cleaner to feed it through the pipe. (and now my pipe is also squeaky clean inside;)
Knot each tip, position the beads along that knot, then knot the two ends together at the desired length. That's it!


Very stylish!
ReplyDeleteThank you!
DeleteLove it! <3 SO CREATIVE!!
ReplyDeleteNice sharing love to read your blog post. Teedesignshop is a social platform where you can share your ideas to design your own t shirts in no time.
ReplyDelete