

Watch the full How-to Install Heavy Duty Snaps video on the Wholecloth Patterns Youtube channel, or follow the instructions below.
Snap Setting Tools and Supplies
Snaps: Dritz Heavy Duty Snaps
Setting Tool: Dritz Heavy Duty Snap Setter
Wholecloth Logan Bag Sewing Pattern
Fabric: Block print cotton gifted from Fiber to Fabric on Etsy. Large blue print. Small blue print. Cream print.
How-to Install No Sew Snaps

Each snap is made up of 4 pieces. The functional pieces of the snap are the stud, which is the piece with the little nub, and the socket, which is the piece with the hole. The other pieces are facings that hold the snap to the fabric. The one shaped like a disk is the decorative piece that goes on the front of the pocket. The one that is shaped like a ring goes on the back of the pocket.

Both facings have prongs on one side. These prongs are aligned with a ridge on the back of the snap pieces with the fabric sandwiched in-between. Setting the snap squishes these pieces together, locking the prongs into the ridge to hold the snap to the fabric

The snaps are set with a little metal tool. One side is the base that holds the facing side of the snap. The other side is a T shaped tool. The flat side goes over the snap, and you hammer on the narrow end to set the snap.

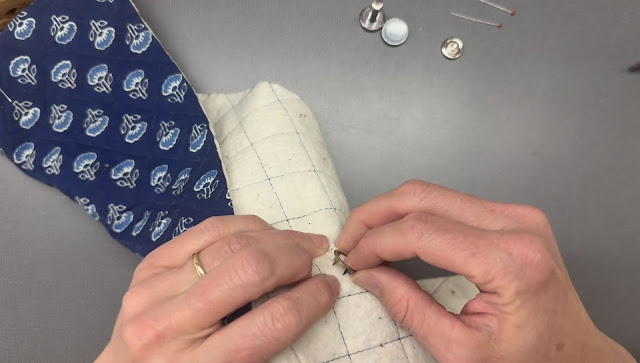
To set the heavy duty snap start by marking the location of the snap on the front of your pocket. I'm showing the location here with crossed pins. Center the front facing over the mark on the fabric. Push the prongs through the fabric. This can take a little manuvering. If you're having trouble pushing the prongs through thick, or tightly woven fabric use a pencil eraser to push the fabric around the prongs.

Align the prongs of the facing with the ridge on the back of the socket side of the snap. When you can feel that the prongs are aligned hold all the layers together and place the facing in the base of the setting tool. Place the other side of the setting tool over the snap.

Hammer on the end of the setting tool 5 or 6 times to mould the pieces of the snap together. Check to see that the 2 sides of the snap are firmly connected. When in doubt hammer it a few more times.
Find the location of the back side of the snap. You can measure to find the location, but I usually use the front side of the snap. You can feel the location of the front snap when you push the ring facing through the fabric.

Repeat the setting process with the back side of the snap. The setting tool has a hole in the middle of the bigger end to accommodate the stud side of the snap.

Follow Wholecloth Patterns
Etsy: Wholecloth Patterns
Youtube: Wholecloth Patterns
Instagram: @_wholecloth #wholeclothpatterns
Newsletter: Join here
TikTok: @_wholecloth
No comments:
Post a Comment