I'm sharing the details of the self-drafted wide leg pants I started making 2 years ago! Read on for a guide to the books and tools I used to draft and make these custom pants, and wide leg pant sewing pattern suggestions if you're not in to starting from scratch.
A while ago I read a post on Instagram where someone at least one fashion cycle younger than I am talked about what a revelation high waisted pants were to her. How they are surprisingly comfortable, and flattering to someone raised on low rise. That post stuck in my head for days. I love high waists
and wide legs, but to me they were no epiphany, more like old friends. The kind of friend you haven't seen in years, but can pick up right where you left off. Age has few benefits, but at least when the fashion pendulum swings, I already know what I'm going to feel good in.
A few years ago, when I'd totally had it with squeezing my bootie into skinny jeans, and was missing the pants from brighter days, I decided I wanted to recreate a style my past self lived in. Something anchored at my natural waist, flowy, but not to the point of palazzo pants. Before, I would have searched high and low for those pants, found only a few choices at the tip of the
fashion trend wave, and lamented the price point. This time, I drafted myself a pattern, and
made myself some pants.
This particular pair of WLPs is sewn with Sew Classic
Slub Linen from
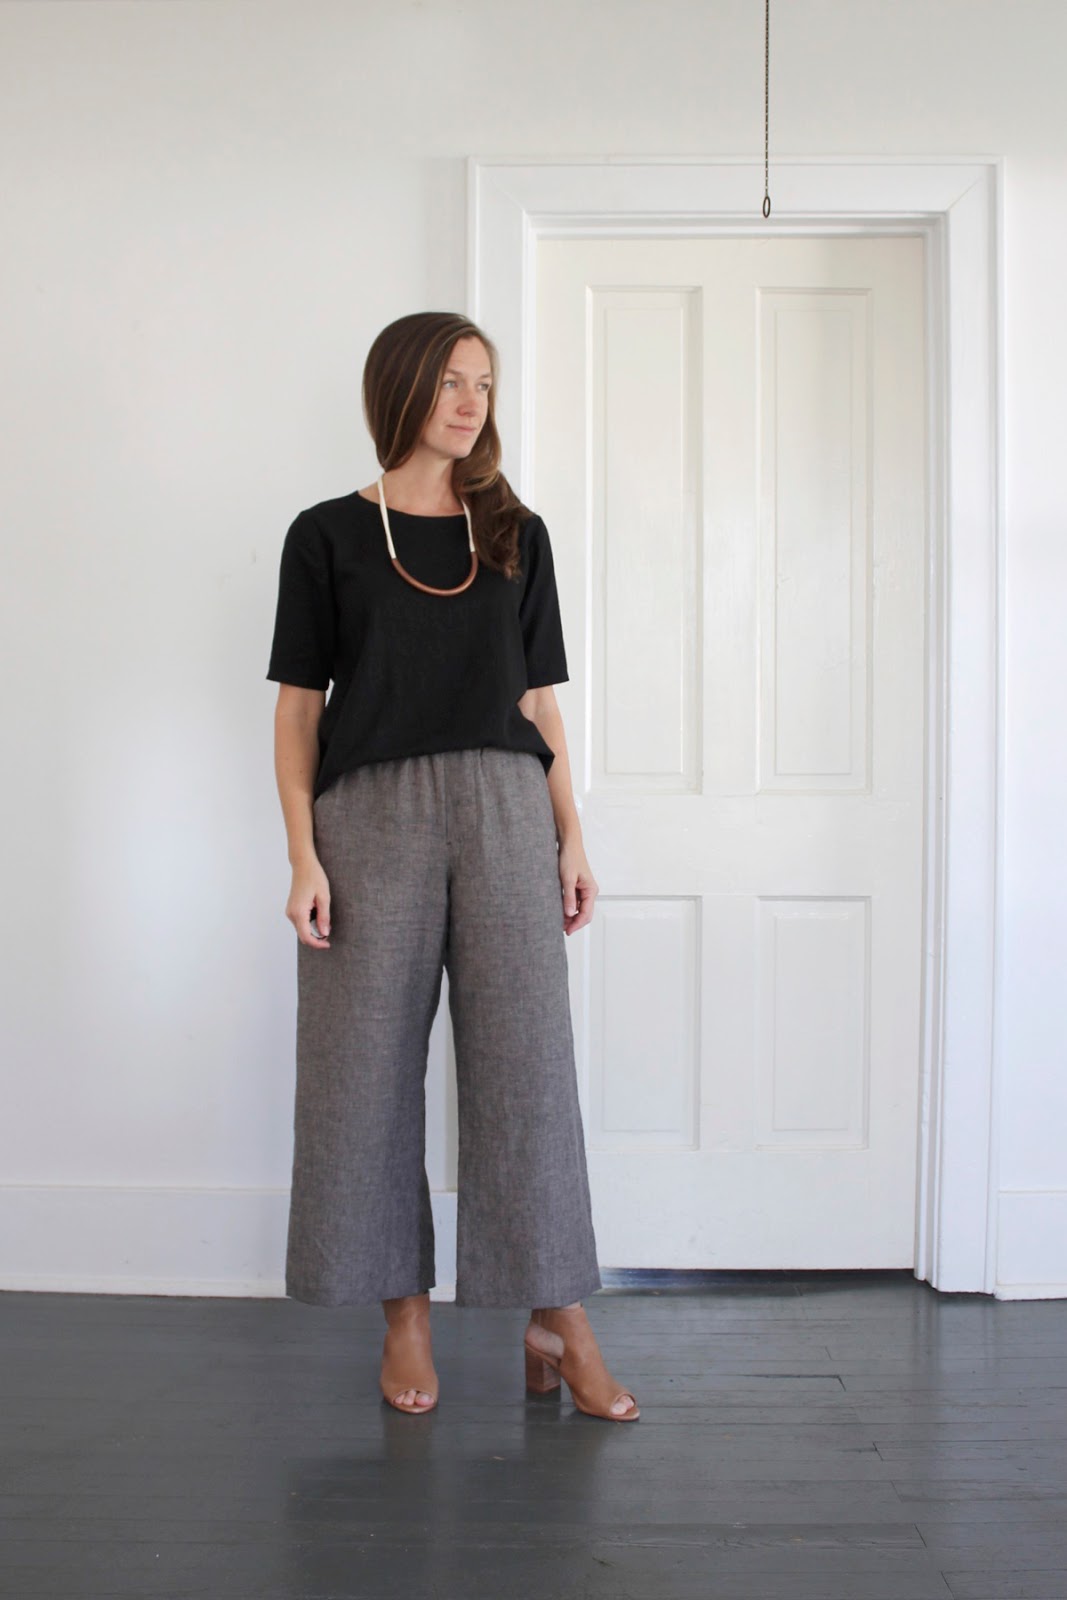
Joann Fabric. It's pretty good fabric, with a nice drape, doesn't cost much (don't forget your coupon!), and is easy for me to get when I feel like experimenting. When I make such a simple style of anything I feel the need to compensate for the lack of technical difficulty with an extra thoughtful finish on the inside. I bias bound the pocket bags and the faux fly on the inside. I serged and topstitched the inner leg, and crotch seams, and serged and top stitched to the edge of the pocket opening on the outer leg seam. The dot tag is a tiny scrap of
Nani Iro double gauze.
These pants are pretty effortless to style up or down. This is my black
Brussels Washer Linen Blend (affiliate)
Scout Tee, and the
DIY Pipe Necklace I made a few months ago. I've worn this necklace in 4 out of 5 of the last blog posts, so I'm gonna go ahead and label it a success (and try to wear something else next time :).
Books and Tools to Draft Your Own Sewing Patterns
Just before tackling my first WLPs I took a pattern drafting class at
Made Institute in Philadelphia. The class was fantastically informative, but if you don't live near a fashion design school don't despair. A confident maker can work out basic pattern drafting without formal instruction. The main resource I took away from the class was the book:
Pattern Making for Fashion Design by Helen Joseph-Armstrong. The book shows where/what to measure and gives step by step instructions for drafting your own patterns with suggested ease for different styles. Based on this book I drafted my first version of the pants. They fit, but as with anything some tweaking was necessary. I made a basted muslin, when I got the stitching where I wanted it I traced over the stitching with a Sharpie (wish I had pictures of that!) so I could be certain which line of stitching was the real one. The resulting pair of
"final" pants were pretty good. As I wore those pants (and once I came down from the maker's high) I identified a few little things I wanted to make better. I used the book
Pants for Real People: Fit and Sew for Any Body by Pati Palmer and Marta Alto to tweak the fit. This is an absolute must read for anyone sewing pants. It very clearly diagrams common fit problems and their solutions. With subsequent versions I made the length shorter, the legs wider, tweaked the crotch curve, and the rise to near perfection (I'm still on the maker's high for this version, gotta wear them a few times to get my objectivity back).
Pattern drafting is easy with a few simple tools. An 18"
clear plastic ruler makes pattern layout and finding right angles easy. A
french curve is essential for creating elegant curves. A
24" curved ruler (let's just pretend I remembered to put this one in the picture), for long gentle curve blending. And your favorite pencil. I like to make the guidelines in a color, then go back over the final outline in #2. You could probably free hand the curves if you want to limit your investment in specific tools, but the standard curves definitely make the finished product look more professional. For the class we drafted onto brown craft paper. I like to use my embarrassingly vast stash of old building plans from my recycling bin in a past life because they are white, but equally sturdy. In a pinch I've used old rolls of gift wrap. The standard way to transfer the marks onto new paper is with a
tracing wheel. The points on this one are much sharper than the one you may already have to transfer marks to fabric. I prefer to trace my patterns onto the same
architectural tracing paper I use for tracing all of my purchased patterns. Then I can easily pin it to fabric with no steps in-between. When I get to a final design, I then transfer the pattern to sturdy paper for reproducibility.
Wide Leg Pants Sewing Patterns
If full on pattern drafting is not your thing, you could start with the True Bias
Emerson Crop Pants (like
these lovelies by
Andrea), the Named Clothing
Ninni Elastic Waist Culottes (like
Katie!) or the
100 Acts of Sewing Pants No. 1 (like
Theresa's) pattern and and use the Pants for Real People book to tweak the fit. The Megan Nielsen
Flint Pants are a slightly more structured jumping off point (loving
Heather's basic black pair). The Helen's Closet
Winslow Culottes also have a more structured waist, but plenty of delicious width through the leg (and
Sara's version is va-va-voluminous!). Or check out the
Sew News Pants Month for a great overview of popular pants patterns.

The repetitive oscillations of the fashion sine curve keep getting closer together, retro 70's, follow vintage 80's, with grunge 90's hot on their heels until everything seems current all at the same time, in one big jumble. Those seeking fashion will fall pray to these trends, a sewist seeking style can make whatever she finds most appealing, and flattering no matter what is in the window at Anthropologie. I've had this post on my mind for a few weeks, but saved it for today to coincide with
Slow Fashion October. Making my own clothes allows me to think of my wardrobe as a continuum rather than something that gets tossed every few years (or even months!) as tastes change. Participating in the online knitting and sewing community has changed my way of thinking about my relationship to clothing and following sustainable fashion blogs (
here, and
here) have changed the way I think about dressing myself. I can safely build a wardrobe around reproducible silhouettes, that flatter my body. When WLP's vanish from store shelves, as is their certain destiny, I'll be ready. Wide leg pants and I need never be parted again.
***
Pants Pattern: Self-Drafted
SaveSaveSaveSaveSaveSaveSaveSave