Tuesday, May 13, 2025

How-to Make Your Own Straight Grain Binding

Learn how to make your own quilt binding to use on this cute quilted bag.

Now that the full size Morris Tote sewing pattern has launched (the big brother of the Mini Morris Tote with a few added features #wholeclothmorris) and the sewalong video tutorial is live, I thought it would be a good time to add to the catalog of skill building videos on the Wholecloth Patterns Youtube channel.  If you're a beginner sewer these short videos will help you learn individual sewing techniques that are used to sew garments, quilts, and most especially bags. 

Both Wholecloth Morris Totes use double fold, straight grain binding to finish the quilted edges and the seams. This is a classic quilt finishing technique that seemed fitting to use for this quilted bag style. Straight grain binding is simple, sturdy, and as well suited to bag sewing as it is to quilt making. For this design I use double fold straight grain binding because the second fold makes it easier to adjust along the back side of the fabric when you're covering multiple layers of thick quilted fabric. I'm reining in my inner maximalist by using light weight denim for the tutorial because it's easy for the viewer to see the difference between the right side and the wrong side of the fabric. Please let your inner maximalist fly free, the binding is a great opportunity to mix prints, use up scraps and add subtle detail to this simple bag. Check out #wholeclothmorris on Instagram for more binding inspiration, and please share your finished bags there. I would love to see them! 

Bias Binding vs. Straight Grain Binding

Both bias cut and straight grain binding look more or less the same, but they have one key difference that determines which one to use for your project. Straight grain binding, as the name suggests is cut along the grain of the fabric, as in the fibers that run the length and width of the fabric. It is very strong, stable, and has no stretch. It lends itself to finishing long straight edges like quilts or rectangular bags, and will create an even line along the edge of your project. Bias binding, also as the name suggests, is cut on the bias of the fabric, meaning it is cut at a 45 degree angle to the grain. This creates a very flexible binding that has quite a bit of stretch. It lends itself to finishing curved edges of garments or bags. The stretch allows it to hug curves without bunching, but can result in a small amount of inconsistency in the width as you push and pull it around curves. Bias binding is used to finish the interior seams for the Wholecloth Fairmount Bag, and you can find my video tutorial for making it on Youtube. 

A full How-to Make Your Own Double Fold Straight Grain Binding video tutorial (perfect for learning how to make your own quilt binding too!) is on the Wholecloth Patterns Youtube channel now. Or check out the cliff notes below.


How-to Make Your Own Straight Grain Binding


Supplies to Make Fabric Binding
To made the double fold, straight grain fabric binding you will need some light weight woven fabric, a ruler, tailor's chalk, scissors and an iron. You will want to use a woven fabric like cotton or linen that is easy to work with and holds creases when it is ironed. 

1. Find the grain of your fabric. 
The fabric grain runs parallel to the selvedge edge of the fabric. If you're cutting on the grain make a fold parallel to the selvedge (and the threads that run along the length of the fabric) and is at least 1" deep. Here I'm cutting my binding across the grain, which also works for straight grain binding. Make sure the fold is perpendicular to the grain (which will be parallel to the threads that run across the fabric) so it doesn't stretch, and is at least 1" deep. Press the fold to make a crease. 


2. Mark the fabric.
Use chalk to mark a line 1" from the fold the whole length of the fabric. The binding will have a finished width of 1/2". If you'd like yours to be a different width you can easily double your desired finished measurement. 

3. Cut.
Cut along the line you've just made. You now have a 1" folded strip of fabric.

4. Join strips for longer binding.
If your binding isn't long enough you can join two pieces together. With the folds opened up so the fabric is flat, and right sides together overlap the ends of the strips so they form a 90 degree angle. The strips form a square where they overlap. Sew diagonally across this square connecting the outer corners of the square as shown in the picture above. 

5. Grade the seam.
Trim the seam allowance to 1/4", press the seam allowance to one side. Refold the joined strips along the center crease. 

6. Fold one side. 
Open the folded strip. Fold one long edge toward the wrong side so that it is just shy of the center fold. Press this new fold into the length of the fabric. Be careful not to disturb the center crease. 

7. Fold other side. 
Repeat the previous step with the other long edge. Again, be careful not to disturb the center crease.

8. It should look like this. 
You now have a strip of fabric with 2 outer folds and the center crease. 

9. Final press. 
Refold the strip along the center crease and give the binding a final press so that it holds it shape when you're working with it. 

You're finished and all set to sew your own Morris Totes!


BUY THE PATTERN!


Follow Wholecloth Patterns


Friday, February 21, 2025

New! Wholecloth Morris Tote Sewing Pattern


The Morris Tote is the quilted version of a classic tote bag. It's a medium sized bag that can carry all of your daytime essentials. The quilted body gives the Morris a soft structure and the quilted front and interior pockets are folded to show off the backing fabrics. All of the edges and seams are finished with binding, creating another opportunity to mix prints or highlight a special fabric. The Morris has a snap closure, short handles and a long adjustable shoulder strap. 

There are two options for approaching the Morris Tote. Option 1 is a fully custom bag. The body and pockets are self-quilted, the straps and handle are made with fabric, and the binding is self-made. Option 2 is the quick sew version of the bag. The body and pockets are made with pre-quilted fabric, the strap and handles are cotton webbing, and the binding is ready made. 

The expanded features of this full-sized Morris Tote are designed to be easily transferred to its little sister, the Mini Morris. You can easily add the snap closure, and shoulder strap to the Mini, or omit them to make the full-sized Morris match your Mini. 

The sewing pattern includes:
- clear step by step illustrated instructions
- dimensions to draft your own pattern pieces or cut the pieces directly from fabric
- instructions to make coordinating binding and handles, or substitute ready-made
- instructions to quilt your own fabric, or substitute pre-quilted
- dimensions in inches and centimeters
- full video tutorial for sewing the Morris (coming to Youtube next week!)

Finished bag dimensions: 10 x 13 x 4 in (25.4 x 33 x 10.2 cm)

(Pssst...the discount code works on the mini and the full-sized Morris, might as well get both!)
Supplies: 
The Morris Tote is made with 2 layers of light weight woven fabric quilted together with a single layer of low loft quilt batting. Here I'm using a 4oz denim as both main and backing fabric, but you can use any light weight fabric, or piece a few together for a more colorful tote. The handles and strap can are designed to me made from the same fabric as the body, with the addition of some medium weight fusible interfacing.  For a speedier sew, you can easily substitute pre-quilted fabric, 1 1/2" webbing for the handles, 1" webbing for the strap and use ready made binding for a faster sew. The Morris (and Mini Morris) are great without the hardware, but for a more versatile tote the full-sized Morris has the options of an adjustable strap and snap closure. For these features you'll need (1) 5/8"(16mm) heavy duty snap, (2) 1" (2.5cm) swivel clasps, (2) 1/2" (12mm) D rings, and a [1] 1"(2.5cm) length adjuster. 

Difficulty: 
The Morris Tote is a good fit for advanced beginner sewists. It involves binding multiple layers of fabric that can take a little bit of practice to get a neat finish. If you're familiar with the process of binding seams for quilts or garments this pattern will be a piece of cake. A determined sewist with a few patterns under their belt can always take it one step at a time. Anyone with a pile of beautiful garments scraps that deserve to be celebrated can make the Morris Tote their own. 

Sewalong: 
I'm planning a full video sewalong making the Morris Tote from start to finish. (It's nearly finished, hoping to have it out next week!) The sewalong will make this pattern more accessible to less experienced sewists. Sign up for the newsletter to be notified of the final release date of the sewalong. Or subscribe to the Wholecloth Patterns Youtube channel.
The Morris Tote sewing pattern is 20% off until Thursday, February 27, 2025. 
Use the code MORRIS20 at checkout. 

Follow Wholecloth Patterns:

Etsy: Wholecloth Patterns

Youtube: Wholecloth Patterns

Instagram: @_wholecloth #wholeclothpatterns

Newsletter: Join here

TikTok: @_wholecloth 


Friday, November 22, 2024

New Wholecloth Patterns Mini Morris Tote Sewing Pattern


The new
sewing pattern is available in the shop!

The Quilted Morris Mini Tote is the tiny version of a classic tote bag. The quilted body gives the Morris a soft structure and the front and interior pockets are quilted and folded to show off the fabrics on both sides. All of the edges and seams are finished with binding, creating another opportunity to mix prints or highlight a special fabric. 

The sewing pattern includes:
- clear step by step illustrated instructions
- dimensions to draft you own pattern pieces or cut the pieces directly from fabric
- instructions to make coordinating bias binding and handles, or substitute ready-made
- instructions to quilt your own fabric, or substitute pre-quilted
- dimensions in inches and centimeters

Finished bag dimensions: 9 x 7 x 4 in (22.1 x 17.8 x 10.2 cm)

Get the pattern:


Exterior: The front of the Morris Tote has a quilted open pocket with a folded cuff to show off the backing fabric. The pattern includes instructions for binding all of the bag edges and making crisp mitered corners on the pocket. Vertical lines of quilting add soft structure to the Morris allowing the bag to stand up on its flat 4" bottom. 


Interior: The interior has a quilted open pocket, and all of the seams and edges are finished with straight grain binding. 
Supplies: 
The entire bag can be made from woven fabric and a little bit of low loft quilt batting. There are no special zippers or hardware. My goal was to design a bag you could sew in a hurry with fabric from you stash. You can easily substitute pre-quilted fabric, 1" webbing for the handles and use ready made binding. 

Difficulty: 
The Morris Tote is a good fit for advanced beginner sewists. It involves binding multiple layers of fabric that can take a little bit of practice to get a neat finish. If you're familiar with the process of binding seams for quilts or garments this pattern will be a piece of cake. A determined sewist with a few patterns under their belt can always take it one step at a time. 

Sewalong: 
I'm planning a full video sewalong making the Morris Tote from start to finish. The sewalong will make this pattern more accessible to less experienced sewists. Sign up for the newsletter to be notified of the final dates for the sewalong. Or subscribe to the Wholecloth Patterns Youtube channel.


The Morris Tote sewing pattern is 30% off until Monday, December 2, 2024. No code necessary.


Follow Wholecloth Patterns:

Etsy: Wholecloth Patterns
Youtube: Wholecloth Patterns

Instagram: @_wholecloth #wholeclothpatterns

Newsletter: Join here

TikTok: @_wholecloth 


Thursday, October 3, 2024

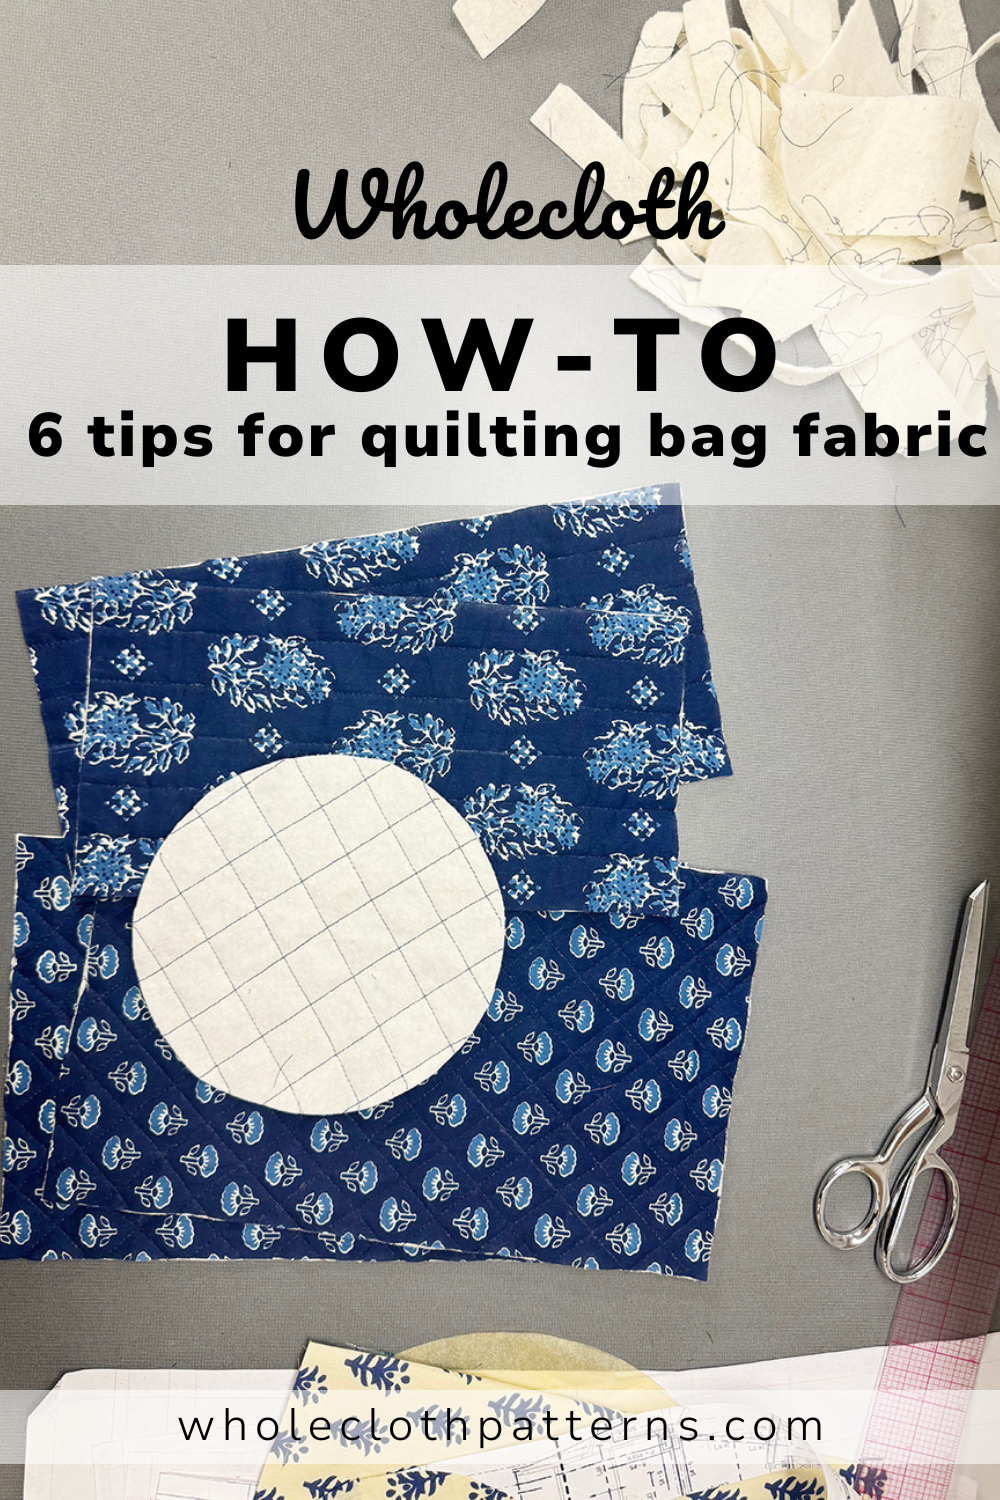
6 Tips for Quilting Fabric for Bag Sewing


Before I switch gears to new patterns and fall sewing, let me clear the worktable of my last summer sewing project. The sewalong for the Logan Bag drawstring bucket backpack featured self-quilted fabrics. This is a great technique for personalizing handmade bags, so I've put together a how-to video and a list of tips focused on quilting fabrics for bag making. You can use these techniques for just about any bag or garment sewing project. 

Quilted fabric is a great choice for handmade bags. The layers of quilt batting, fabric, and stitches work together to provide the structure and durability that can stand up to the wear and tear of a handbag. Changing the weight of the fabric, the fiber and thickness of the batting, or the spacing of the quilting allows you to manipulate the structure of your finished fabric. You could use pre quilted fabric, but you'll have better choices and more control if you quilt it yourself.  

These tips are directed toward quilting small or shaped pieces of fabric where avoiding distortion can be a bit tricky. You could quilt the fabric and then cut out your pattern pieces (a completely legit way to tackle a quilted project), but I prefer to quilt the pattern pieces individually. It gives me more control over the placement of the fabric print and the lines of quilting on the finished project. 

A full How-to Quilt Fabric for Any Bag video tutorial is on the Wholecloth Patterns Youtube channel now. Or scroll down to see my tips for quilting fabric to make bags. 


6 Tips for Quilting Fabric to Make Bags

1. Pin across the whole fabric.
The key to successful quilting is to prevent the fabric from slipping and sliding around on top of the batting. Don't just pin around the edges of the fabric, space the pins across the body of the fabric at 2-3" intervals. These fixed points keep the fabric from slipping around while you sew those first few lines of quilting. 

2. Cut the quilt batting bigger than the fabric piece.
When sewing quilted bags cut the pattern pieces out of your main fabric, but not the quilt batting or backing fabric. Cut the batting and backing about an inch bigger than the main fabric pieces. This has 2 advantages. First you can precisely position your quilt lines relative to the shape of your finished bag. Second, any minor shrinkage or distortion to the main fabric pieces due to quilting can be adjusted before you construct your bag. 
3. Use a walking foot. 
When quilting any fabric, or sewing very thick squishy fabrics, switch to the walking foot for your sewing machine. The walking foot lifts up as the needle goes down reducing the chances that the presser foot will push the fabric out of alignment as it sews. 
4. Start quilting in the middle.
It's tempting to start quilting at one edge of the pattern piece and work across the whole body of the fabric in one wave, but this increases the chances of distorting the fabric as you quilt. Begin your first line of quilting at the center of the fabric and work toward the edges. Starting in the middle shortens the distance between the starting line and the finish line of quilting, reducing the length of fabric that can be shifted out of place. 

5. Alternate the direction of the quilting.
If you first sew from bottom to top, next sew from top to bottom. This zig zag movement across the pattern piece helps to correct, rather than increase, any shift in the fabric. 
6. Sew over the edges.
Do not backstitch! It can be counterintuitive for bag makers, and garment sewists who are in the habit of anchoring their seams for strength. When quilting, sew right over the edge of the fabric. The extra perimeter of batting (and possibly backer fabric) will be trimmed off after quilting. It leaves loose ends of of stitching that could make a bag sewist nervous, but those stitch lines will be secured within the seam allowance when you make your bag, and trimming the over run with the batting leaves the neatest edges. 

Ready to sew a quilted bag? Get your copy of the Logan Bag drawstring bucket backpack, and try out your new skills. 


Follow Wholecloth Patterns


Wednesday, July 10, 2024

Wholecloth Logan Bag Video Sewalong


The Logan Bag sewalong is now available on the Wholecloth Patterns Youtube channel. These video sewing instructions will cover every step of making the Logan Bag drawstring bucket backpack. I've broken the sewing tutorial into two manageable sections. In Part 1 we'll get an overview of the bag, compare the standard and mini sizes, and discuss options for making the bag in just about any weight of fabric. Then we'll sew the body of the bag. In part 2 we'll pick up where we leave off by sewing the lining right on through to attaching the drawstring at the end of the pattern. 

I'm calling the Logan Bag an intermediate pattern because it requires sewing some bulky seams around piping where a bit of precision is required. I hope that the video tutorial will make this pattern accessible to less experienced sewists. Watch me sew the bag and build the knowledge and confidence to make your own. 

The video instructions are available to everyone, but you'll need a copy of the sewing pattern to make the Logan Bag


Basic Sewing Skills Tutorials for Making the Logan Bag.

The Wholecloth Patterns Youtube channel is filling up with video tutorials for basic bag making skills. You can kick-start your Logan Bag sewing by prepping perfect piping to match your bag using the How-to Make Your Own Piping tutorial.  Learn how to install the bag hardware with the How-to Install Heavy Duty Snaps, and How-to Install Eyelets videos. Get the finishing touches just right with the How-to Tie the Fisherman's Knot video. All of these are skills to add to your sewing arsenal, and the perfect place to start if you're a beginner. 

Fabrics & Supplies Used in the Logan Bag Sewalong.


The block prints were gifted from Fibers to Fabric. It's an easy source for color matched prints of different prints. 

Watch the Logan Bag Sewalong Videos.

Watch the full Logan Bag tutorials or hop around the videos using the time stamps in the text below the video. Use them to rewatch the parts you need, and skip the parts you don't. Of course, please like and subscribe if you find the information helpful! Watch Part 1 Watch Part 2


Follow Wholecloth Patterns

Etsy: Wholecloth Patterns

Youtube: Wholecloth Patterns

Instagram: @_wholecloth #wholeclothpatterns

Newsletter: Join here

TikTok: @_wholecloth 


Tuesday, June 4, 2024

NEW How-to Install No Sew Eyelets Video & Tutorial


The Wholecloth Logan Bag uses a drawstring top closure where the string travels through eyelets  around the top opening of the bag. I'm going to demonstrate how to install the Dritz Extra Large Eyelets on the Standard size Logan Bag, but the process is the same for the smaller eyelets used on the Mini Logan. 

I like the Dritz Eyelets because they can be installed with basic household tools, and don't require special pliers. The Dritz eyelet kit comes with a little tool for setting the eyelets that can easily be stored with any leftover hardware. It's a basic, entry level supply that any beginner can use. I've used them for all of my sample Logan Bags and have found them to be durable too. 

Let's start with the difference between eyelets and grommets. While they are technically two different things Dritz, the company that manufactures most big box sewing hardware like this, uses them interchangeably. Their grommet tool is used to install Extra Large Eyelets. Their grommets sometimes have a third piece, a plastic washer that compresses in the space between the decorative front hardware and the facing on the back, but not always. For basic bag sewing, you could use Dritz grommets and eyelets interchangeably. I'm calling this an eyelet tutorial, because I use the Dritz hardware, and that is how they are labeled. 

Watch the How-to Install Eyelets video on the Wholecloth Patterns Youtube channel, or follow the tutorial instructions below. 

Eyelet Setting Tools & Supplies

Dritz Extra Large Eyelets

Dritz 1/4" Eyelet Kit

Wholecloth Logan Bag Sewing Pattern

Fabric: Block print cotton gifted from Fiber to Fabric on Etsy. Large blue print. Small blue printCream print.

How-to Install Dritz Extra Large Eyelets


The Dritz Extra Large Eyelets consist of two pieces. The piece that goes on the outside of your project is more decorative and has a short tube around the center opening. The piece that goes on the inside of your project has small prongs around the center opening. 


To install the eyelets you need a little two piece tool that in included with the eyelet kit. The flat round piece (shown on left) is the base. It holds the outside of the eyelet while you set it. The other piece is a setting pin that goes inside the eyelet and you hammer on one end to set the eyelet. 


The inside facing piece goes over the little tube in the back on the outside piece with the fabric sandwiched between. When you set the eyelet the tube is rolled down to touch the facing and lock the eyelet onto the fabric. 


To set the eyelets mark the center point of where the eyelet will be on your fabric. Center the outside piece of the eyelet on the mark and trace the inside of the center ring with a chalk pencil. 


Cut out the inside of the circle you just marked. You can do this by cutting an X across the circle with scissors or an xacto knife. 


Trim the flaps of the X to make an opening in the fabric. Cut a little bit at a time, frequently checking to see if the center tube of the front of the eyelet fits through the hole. It's better to be a little too small than too large. 


Push the front of the eyelet through the hole. 


Turn the project over so you are now working from the wrong side of the fabric. Place the base of the setting tool on your work surface, and place the outside of the eyelet in the base. There is a dip around the middle of the base that accommodated with ridge in the eyelet. 


Working from the wrong side of the fabric, place the eyelet facing over the tube of the outer eyelet, with the prongs pointing toward the fabric. Place the short end of the setting pin into the center hole of the eyelet.


Hammer the end of the setting pin a few times. Use moderate pressure when hammering. The ridge around the setting pin rolls the tube down around the eyelet facing as you hammer. If you hit the pin too hard it can crack the tube. Hammer gently (is that a thing?!) so that the tube rolls evenly. 


Check to see that the front and back of the eyelet are firmly connected. If you can wiggle the facing, hit it a few more times with the hammer and setting tool. 


When the eyelet is firmly attached to the bag you're finished! Move on to the next eyelet. 


Follow Wholecloth Patterns