Showing posts with label Logan Bag. Show all posts

Thursday, October 3, 2024

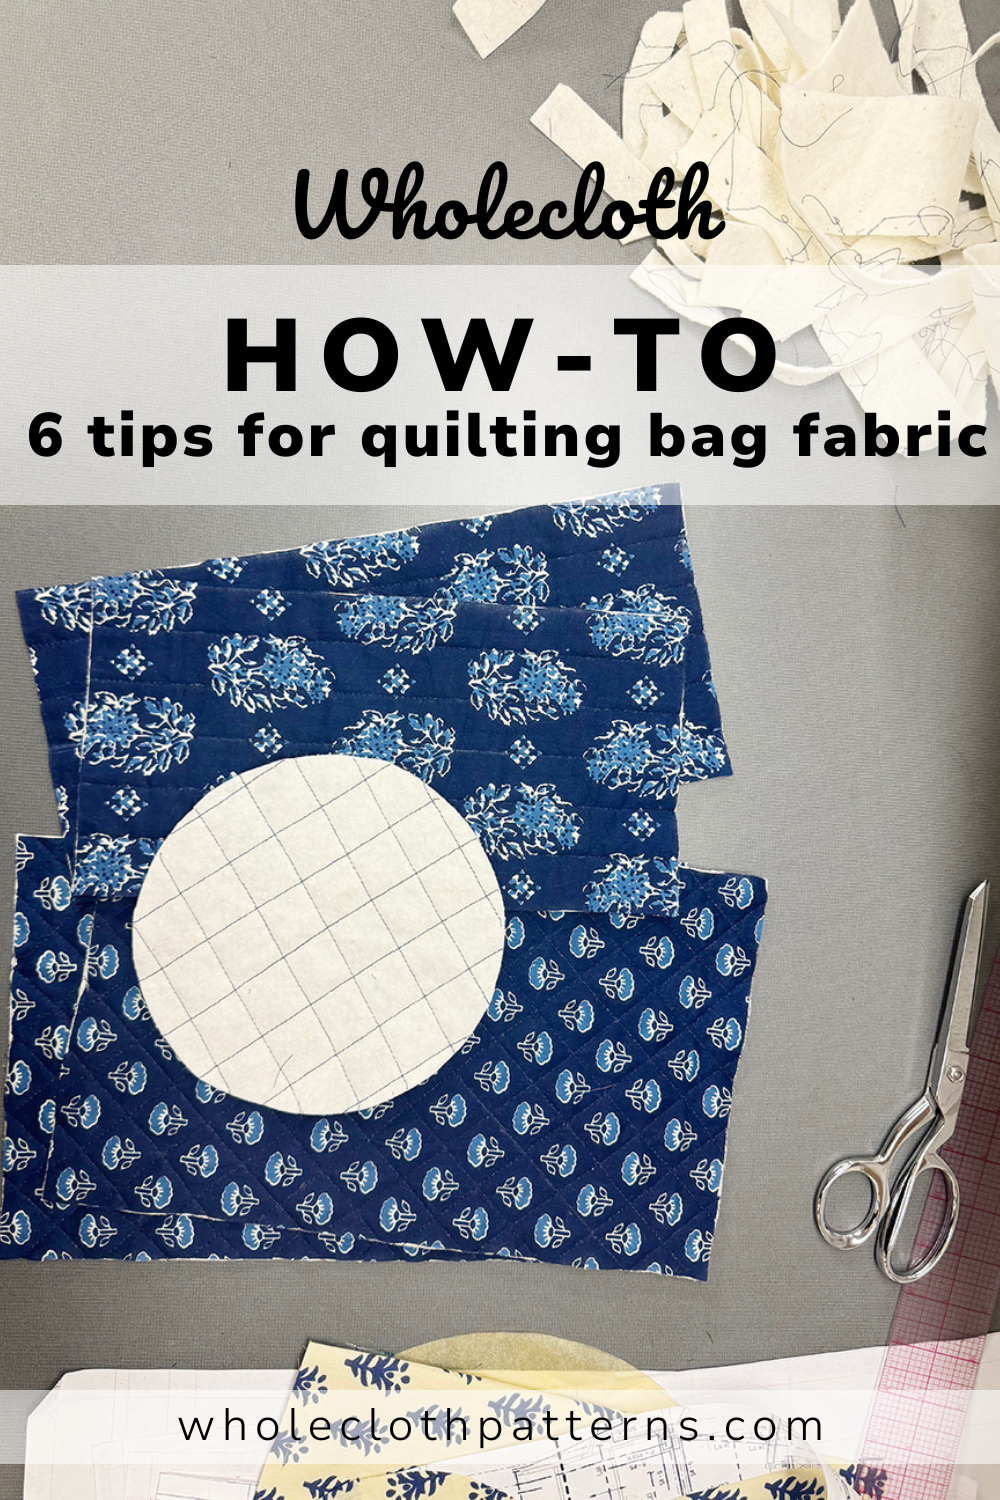
6 Tips for Quilting Fabric for Bag Sewing


Before I switch gears to new patterns and fall sewing, let me clear the worktable of my last summer sewing project. The sewalong for the Logan Bag drawstring bucket backpack featured self-quilted fabrics. This is a great technique for personalizing handmade bags, so I've put together a how-to video and a list of tips focused on quilting fabrics for bag making. You can use these techniques for just about any bag or garment sewing project. 

Quilted fabric is a great choice for handmade bags. The layers of quilt batting, fabric, and stitches work together to provide the structure and durability that can stand up to the wear and tear of a handbag. Changing the weight of the fabric, the fiber and thickness of the batting, or the spacing of the quilting allows you to manipulate the structure of your finished fabric. You could use pre quilted fabric, but you'll have better choices and more control if you quilt it yourself.  

These tips are directed toward quilting small or shaped pieces of fabric where avoiding distortion can be a bit tricky. You could quilt the fabric and then cut out your pattern pieces (a completely legit way to tackle a quilted project), but I prefer to quilt the pattern pieces individually. It gives me more control over the placement of the fabric print and the lines of quilting on the finished project. 

A full How-to Quilt Fabric for Any Bag video tutorial is on the Wholecloth Patterns Youtube channel now. Or scroll down to see my tips for quilting fabric to make bags. 


6 Tips for Quilting Fabric to Make Bags

1. Pin across the whole fabric.
The key to successful quilting is to prevent the fabric from slipping and sliding around on top of the batting. Don't just pin around the edges of the fabric, space the pins across the body of the fabric at 2-3" intervals. These fixed points keep the fabric from slipping around while you sew those first few lines of quilting. 

2. Cut the quilt batting bigger than the fabric piece.
When sewing quilted bags cut the pattern pieces out of your main fabric, but not the quilt batting or backing fabric. Cut the batting and backing about an inch bigger than the main fabric pieces. This has 2 advantages. First you can precisely position your quilt lines relative to the shape of your finished bag. Second, any minor shrinkage or distortion to the main fabric pieces due to quilting can be adjusted before you construct your bag. 
3. Use a walking foot. 
When quilting any fabric, or sewing very thick squishy fabrics, switch to the walking foot for your sewing machine. The walking foot lifts up as the needle goes down reducing the chances that the presser foot will push the fabric out of alignment as it sews. 
4. Start quilting in the middle.
It's tempting to start quilting at one edge of the pattern piece and work across the whole body of the fabric in one wave, but this increases the chances of distorting the fabric as you quilt. Begin your first line of quilting at the center of the fabric and work toward the edges. Starting in the middle shortens the distance between the starting line and the finish line of quilting, reducing the length of fabric that can be shifted out of place. 

5. Alternate the direction of the quilting.
If you first sew from bottom to top, next sew from top to bottom. This zig zag movement across the pattern piece helps to correct, rather than increase, any shift in the fabric. 
6. Sew over the edges.
Do not backstitch! It can be counterintuitive for bag makers, and garment sewists who are in the habit of anchoring their seams for strength. When quilting, sew right over the edge of the fabric. The extra perimeter of batting (and possibly backer fabric) will be trimmed off after quilting. It leaves loose ends of of stitching that could make a bag sewist nervous, but those stitch lines will be secured within the seam allowance when you make your bag, and trimming the over run with the batting leaves the neatest edges. 

Ready to sew a quilted bag? Get your copy of the Logan Bag drawstring bucket backpack, and try out your new skills. 


Follow Wholecloth Patterns


Sunday, February 25, 2024

How-to Make Your Own Piping Video Tutorial


Follow this video tutorial to make your own custom piping to match any sewing project. Piping is a crisp, classic way to add structure and define the edges of a handmade bag. The Wholecloth Patterns Fairmount Bag uses piping to define the bottom curve of view A, that might otherwise be easily crushed out of shape. It's also used on the Logan Bag to strengthen the circular bottom seam, and help hold its bucket shape. You could buy piping, but it's easy to make and gives you complete control over the look and quality of your finished bag. 

Tools for Making Piping

The only semi-specialty tool you need to make piping is the zipper foot for your sewing machine. The zipper foot allows you to sew right up against the edge of the piping cord when you're sewing the piping and when assembling your bag. The foot I use in the video is the Bernina #4. You'll want to find the foot that works with your sewing machine.  A zipper foot is essential for sewing bags, and is included with most sewing machines. 

In addition to the zipper foot you'll need a few very basic sewing tools. We'll use scissors, a marking tool, and a ruler. 

Supplies for Making Piping

Piping is basically a string wrapped in fabric. From light weight cotton lawn to upholstery fabric, any woven fabric can be used to make piping. Keep in mind that heavy fabrics will work best with thicker piping cord, and lighter fabrics will give the best coverage to thinner piping cords. In the video I'm demonstrating with light weight denim from Joann. I've also made bags piped with corduroy, or canvas. 

Of course, the filler in piping isn't actually string (although I've used yarn in a pinch). For the most predictable results use the specialty product called piping cord. My favorite is a cotton filler cord surrounded by polyester braid. The cotton is sturdy but easy to work with, and the surrounding braid allows the cord to move smoothly inside the finished fabric cover. The piping cord in the tutorial is from Great Lakes Cordage on Amazon. You can buy small quantities of many sizes of cord, and variety packs of multiple sizes. This variety pack has all 3 sizes discussed in the tutorial. It's a great way to experiment with the scale of your piping to the fabric and project. Once you try piping cord you'll never improvise with yarn or string again. 


DIY Piping is used on the Wholecloth Patterns 
sewing patterns. 


Follow Wholecloth Patterns

Etsy: Wholecloth Patterns

Youtube: Wholecloth Patterns

Instagram: @_wholecloth #wholeclothpatterns

Newsletter: Join here

TikTok: @_wholecloth 


Saturday, December 3, 2022

Fall Celebration Outfit

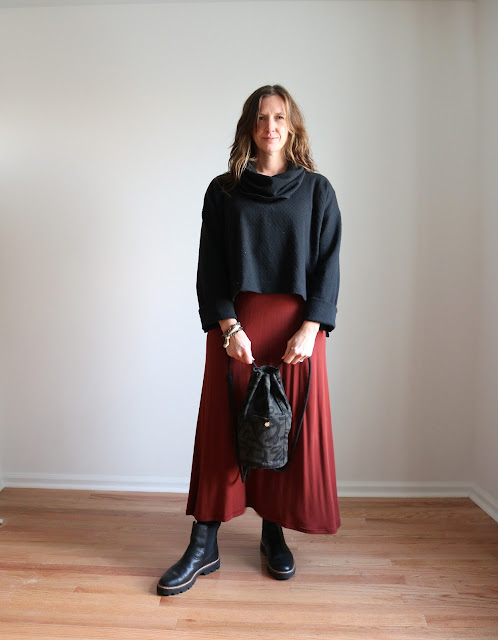
I'm tempted to call this post "an outfit to go with my bag" because that's exactly how it came about. As I immerse myself in bag sewing I try to keep the big picture in mind. The big picture, of course, being the one that goes on Instagram. And, in that big picture my bag isn't just hanging on a hook (although I like that picture too), but it goes with a great handmade outfit. So, here we have a Mini Wholecloth Logan Bag to go with my outfit.


Bag Details:
Of course, you can find the Wholecloth Logan Bag sewing pattern in the Wholecloth Patterns shop. It's a drawstring bucket backpack with a front snap pocket, and an inner zip pocket that comes in two sizes. This is the mini. The fabric is Cotton + Steel In Bloom On The Way canvas in Night. I love the black on gray abstract print, as you may have noticed from the matching Tether Pouches in the background. (Tether pattern is in the shop, just sayin'.)

Outfit Details (sort of):
I'm not going to rehash the specs of old makes here. As someone who has been sewing my own wardrobe for years I'm always looking for ways to make new outfits out of old clothes. Here we have two older pieces, a Sallie Dress from Closet Core Patterns, and a cowl neck sweater from a self-drafted pattern you've seen plenty of here. I rarely wear these pieces. The dress is a bit low cut for my taste. I made it in a hurry (in 2016!) and neglected to confirm that the deep V was within my comfort zone. I'm making it work for the pictures, but it doesn't really work for me in real life. I've morned the unwearability of this dress for years (six of them!!). The rayon jersey knit fabric has such nice drape and movement, that I really want to wear it all summer long. There in lies the problem. I had this flawed dress firmly in the warm weather category, when I really just needed to reframe it as a cold weather dress. Easy.

This fall when I opened up my closet a flash of rust caught my eye (probably as it was falling off the hanger) and my mind leapt to pumpkin spice, crunchy leaves, and my mother's birthday party.  I could have this delightful skirt swishing around my stockinged legs all winter long with the right layers. 

Enter the self-drafted sweater. I made this in a hurry (no blog post or photo evidence, but in 2019) when I needed a black top. The fabric was a bit flimsy for the outfit I had in mind, so I never (really, never!) wore it. Somehow these two imperfect pieces work perfectly together, and have been worn more in the last two months, than in all their other years combined. 
I'm not sure there is a moral to this story. By all means, purge your closets. I tend to hang on to all clothing, especially things I've made. Maybe I should have moved these pieces on long ago. I'm pretty pleased to have them now, because they go so nicely with my bag. 

Thursday, November 18, 2021

Sewing Tutorial: How-to Sew a Quilt Block Front Panel for the Logan Bag

My intention with the simplicity of the Logan Bag sewing pattern design is that it is easy to customize. I have too many pattern hacks and custom fabrics in mind for one woman, but this one made it to the top of my to-do list. The rectangular front pocket panel is just asking to be chopped up and put back together with pretty scraps. I'm not much of a quilter (yet?!), but I thought I'd share my process and the template to make your own quilted Logan Bag. There are templates for both the Mini and Standard sizes. The one I'm showing here is Standard, it's just the right size for bigger knitting projects, and I have a sweater on my list for winter knitting. 
I made a few test quilt blocks with scrap fabric before settling on the final fabric. I used a denim from my stash that is dark on the right side, and light on the wrong side. I used the wrong side to make the contrasting lighter pieces. I made a sandwich of the denim, a single layer of cotton quilt batting for a little loft, and fusible interfacing for structure. The whole bag is quilted with simple lines 1" apart. After making the quilted additions to the exterior I just sewed the pattern as written. It's a simple way to customize the Logan Bag. You will need the full Logan Bag pattern to do this pattern hack. Tutorial instructions are in a handy pdf you can store with your Logan Bag pattern. 

The quilted pocket design is a play on the classic flying geese quilt block, and inspired by the stacked triangle texture of the Fragment Scarf. It brings making full circle to carry knitting in a homemade bag inspired by knitting! 

I've made up a few more Hardware & Supply kits for Christmas giving. To sweeten your holiday making, I'm offering free US shipping on the Hardware & Supply Kit while the current inventory lasts. The pattern and kit would be a lovely holiday gift for your sewing bestie, or sew one up for a knitting friend.
Get the tutorial here:
Get the full pattern here:
Get the kit here:
Consider this your quilted Logan Bag starting point. Let the creativity flow. As always, I would love to see where this pattern takes you. Share your finished bags using the hashtags #wholeclothloganbag & #wholeclothpatterns. Be sure to tag me @_wholecloth.


Friday, October 15, 2021

Bag Making: How-to Tie the Fisherman's Knot

The Logan Bag is a drawstring bucket backpack with a continuous cord that closes the top opening of the bag and acts as the shoulder straps. Using the fisherman's knot to fasten the ends of the drawstring makes the shoulder straps adjustable.  


There is no one right way to tie the knot, and any knot that holds the ends of the string together will do just fine. But, I thought I'd share the fisherman's knot. It's my favorite knot for the Logan bag. After trying a few different knots, fancy and plain, I settled on this one as working best for me. 

I like the fisherman's knot for two reasons. First, it allows you to adjust the length of the shoulder straps.  Moving the knots a few inches lets you to wear the bag comfortably in many different ways. I usually lengthen mine to wear the bag across my body, but make them as short as possible to wear it on one shoulder. I can make this change on the move with this simple knot.  I also like its low profile. It's basically two simple overhand knots, that are less bulky than a single know. The smaller knots naturally follow the pull of the drawstring. Even with the thick rope of the Standard Logan Bag the two small knots blend into the design of the bag. Of course, you'll want to trim final length of the drawstring to fit your body and preference.
Below you'll find a handy video tutorial that shows the adjustable straps in action, and how to tie the fisherman's knot. I've also got step by step photographs if pausing a video isn't your thing. I'm using the same drawstring that comes in the Hardware & Supply Kit for the Mini Logan Bag. 


How-to Tie the Fisherman's Knot

This image is really the key to the fisherman's knot. It is basically two overhand knots tied around the opposite string. 


When the knots are tightened you can pull the knots away from each other to shorten the loop of rope. 


Or pull the the strings to lengthen. 

Logan Bag Sewing Pattern
Head on over to the Wholecloth Patterns store to get your copy of the Logan Bag sewing pattern. 

Get the pattern!


The Logan Bag Hardware and Supply Kit has all the hardware, installation tools, and notions you'll need (including the drawstring) to make either the Standard or Mini Logan Bag. 

Get the kit!


Wednesday, September 29, 2021

Bag Making: Logan Bag Hardware & Supply Kit

The Logan Bag drawstring bucket backpack has quite the list of hardware and supplies. There is a snap front pocket,  zippered interior pocket, and eyelets along the opening. It's got a drawstring closure, and optional self made piping around the bottom. Heavy duty fusible stabilizer helps keep the shape of the base. I chose components that are easily sourced from craft shops and online suppliers, but you might not be able to find everything at one store. To make sewing your Logan Bag even easier, I've assembled a kit for one stop Logan Bag hardware and supply shopping. The components were selected with ease of installation and professional finish in mind. 

Wholecloth Patterns Logan Bag drawstring bucket backpack sewing pattern

Standard Contents: 
2 heavy duty snaps (1 extra for practice)
1 snap tool
7” zipper
10 extra large eyelets 
1 eyelet tool
10” square of stabilizer
⅜” drawstring  
01 Piping Filler Cord

Wholecloth Patterns Logan bag drawstring bucket backpack sewing pattern
Mini Contents: 
2 heavy duty snaps (1 extra for practice)
1 snap tool
5” zipper
12 large  eyelets (2 extra for practice)
1 eyelet tool
6” square of stabilizer
1/4” drawstring 
00 Piping Filler Cord


The specialty tools needed to install the snaps and eyelets are included in the kit. A few common household and sewing tools are also necessary. You will need to have a hammer to install the hardware, x-acto knife to make the eyelet openings, a cutting mat or wood block to cut and hammer on, tailor's chalk for marking the placement of the hardware, a piping foot or zipper foot to make your own piping, and a heavy duty needle (such as 110/18 or 100/16) to make sewing through many layers of heavy duty fabric possible. It's also nice, but not mandatory, to have clips for holding thick fabrics together that might be difficult with pins. 

Get yours now!


Don't forget the discount!
The Logan Bag sewing pattern is 15% off until Friday, October 1st. Use the code LOGAN15 at checkout to get the launch week discount!

Get yours now!


Saturday, September 25, 2021

Bag Making: Introducing the Logan Bag Sewing Pattern


The new
sewing pattern is now available in the shop!

The Logan Bag

The Wholecloth Logan Bag is a drawstring bucket backpack. It has an easy access snap pocket at the front and a secure zipper pocket on the inside. There is a drawstring closure. The bag can be worn in many ways from backpack to cross body. The pattern come with two sizes of bag. The Standard size is designed to hold everything you need for a day out and about. The Mini will hold all the essentials like your wallet, phone and keys. 

The sewing pattern comes with 2 sizes of print at home PDF pattern, and clear step by step illustrated instructions for creating your bag. This pattern is written for heavy weight fabrics. We recommend 10 oz. canvas or similar. Lighter fabric can be used with the addition of medium weight interfacing. 

The pattern includes:
- step by step illustrated instructions
- print at home and assemble pdf pattern pieces 
- dimensions to draft your own pattern pieces 
- pattern and instruction to sew 2 different sizes of Wholecloth Logan bag.

Finished Bag Dimensions:
Standard: 10"x20"
Mini: 6"x12"

I've been working on this pattern little by little for most of the year. The benefit of the extended time in pattern development is that I've been road testing my bag for months. I love the hands-free convenience of wearing a backpack, and the reach-in accessibility of the drawstring top. It's a great everyday style. 

The bags shown here are made with 10oz cotton canvas. I didn't prewash it to maintain the stiffness of the new fabric. The rigid fabric, and a reinforced base, allow the bag to stand up for easy access, or working as a portable knitting basket. Lighter fabrics will have more slouch, and I recommend reinforcing them with medium weight fusible interfacing for the best result. The blocked construction of the exterior lends itself to highlighting a special print, or color blocking, or even a quilt square (stay tuned!). There are so many possibilities for customizing this bag. 


Logan Bag Hardware & Supplies

This bag calls for quite a bit of specific hardware and supplies. You can buy all of it at a craft store or online, but to make it as easy as possible to get behind the sewing machine I've put together a kit. The Hardware & Supply kit is one stop shopping for all the bits and pieces necessary to sew a Logan Bag

I'll be talking more about the kits later in the week. They are in the shop, and the quantity is limited, so get your Hardware & Supply Kit now!


Logan Bag Pattern Discount
Of course, there is a launch week discount. Use the coupon code LOGAN15 for 15% off the Logan Bag sewing pattern until October 1st. 
Get yours now!

I would love to see where you take this bag (physically  and aesthetically). Share you Logan Bag on Instagram with #wholeclothloganbag & #wholeclothpatterns. And tag me @_wholecloth.